Howto compile Monodevelop 2.2 from trunk in Ubuntu 9.10
I wanted to try out the new monodevelop 2.2 beta in Ubuntu but had some trouble installing it, so I thought i'd share.
sudo aptitude remove monodevelop
sudo apt-get build-dep monodevelop
sudo aptitude install subversion gnome-sharp2 libmono-microsoft-build2.0-cil
svn co svn://anonsvn.mono-project.com/source/trunk/monodevelop monodevelop-svn
cd monodevelop-svn
./configure --profile=core
make
sudo make install
Wednesday, December 02, 2009
Monday, December 01, 2008
fileformat wiki
I created a wiki for documenting binary file formats since I feel the Internet is lacking a good collaborative resource for this kind of information.
Feel free to help me out at http://fileformatwiki.org
PS. This is not intended to be in competition with the website www.wotsit.org, but rather a supplement.
Feel free to help me out at http://fileformatwiki.org
PS. This is not intended to be in competition with the website www.wotsit.org, but rather a supplement.
Thursday, October 02, 2008
Running MacOS X as guest in VirtualBox
I have been looking for a while for a solution where I could easily work with MacOS X on my workstation. I am currently running Ubuntu, with a virtual Windows XP in VirtualBox for Photoshop, Flash and some other Windows-software.
Since the MacOS X runs on the x86 architecture these days, I figured I should be able to run a virtual MacOS X as well.
However after some looking around, it appears not to be possible. And it's not a technical problem, but rather a issue of the MacOS X EULA:
"This License allows you to install and use one copy of the Mac OS X Server software (the "Mac OS X Server Software") on a single Apple-labeled computer."
The only solution for now appears to be to use VMWare together with a cracked version of MacOS X and follow a long series of installation instructions.
However, this is not a working solution for me, since I prefer to use the open source VirtualBox rather than the commercial and NSA funded VMWare [1, 2].
There is some discussion in virtualbox.org regarding MacOS X guest support, but Sun appears to officially ignore it (the OS is not even listed here for example).
Wednesday, October 03, 2007
Convert to iPod Nano video with ffmpeg
Just got my iPod Nano with video and the first thing I noticed was that it only supported one video format and that iTunes didnt even want to convert to this format for certain video files.
The next thing I noticed, when I finally managed to get iTunes 7.4.3 to accept a video (it refuses .avi files, accepts .mpg files), it converted a 22 minute MPEG-1 video in about 50 minutes time on my Core 2 Duo E6600). Even then, the resulting file lacked the audio track and was useless.
So after some poking, here's a pretty good ffmpeg syntax to produce nice iPod videos with acceptable sound, should work with all input types supported by your ffmpeg build:
It took 3 min 14 seconds for ffmpeg to encode the file I used.
From my sample input file of 22 minutes good quality video, the output file was 42 MB.
(Thats about 95 Simpsons episodes on a 4GB iPod Nano :-)
Note: Some versions of ffmpeg calls the audio codec "aac" instead of "libfaac".
For Windows, I used ffmpeg-r10461-gpl-static-win32.tar.bz2 from http://arrozcru.no-ip.org/ffmpeg_builds/
Oh, iTunes ALSO refuses to accept files named something.avi.m4v
You must remove the ".avi" part of the filename.
The next thing I noticed, when I finally managed to get iTunes 7.4.3 to accept a video (it refuses .avi files, accepts .mpg files), it converted a 22 minute MPEG-1 video in about 50 minutes time on my Core 2 Duo E6600). Even then, the resulting file lacked the audio track and was useless.
So after some poking, here's a pretty good ffmpeg syntax to produce nice iPod videos with acceptable sound, should work with all input types supported by your ffmpeg build:
ffmpeg -i infile.avi -f mp4 \
-acodec libfaac -ar 44100 -ab 128 \
-vcodec mpeg4 -maxrate 2000 -b 1500 \
-qmin 3 -qmax 5 -bufsize 4096 -g 300 \
-s 320x240 -r 30000/1001 outfile.mp4
It took 3 min 14 seconds for ffmpeg to encode the file I used.
From my sample input file of 22 minutes good quality video, the output file was 42 MB.
(Thats about 95 Simpsons episodes on a 4GB iPod Nano :-)
Note: Some versions of ffmpeg calls the audio codec "aac" instead of "libfaac".
For Windows, I used ffmpeg-r10461-gpl-static-win32.tar.bz2 from http://arrozcru.no-ip.org/ffmpeg_builds/
Oh, iTunes ALSO refuses to accept files named something.avi.m4v
You must remove the ".avi" part of the filename.
Tuesday, October 24, 2006
AJAX guide - part 1
The first part of a guide series for writing AJAX-enabled websites was just published, the guide is written by me, you can read it here (the guide is in Swedish)
http://www.ajax-forum.se/del-1-introduktion-till-ajax-t13.html
http://www.ajax-forum.se/del-1-introduktion-till-ajax-t13.html
Wednesday, October 04, 2006
Firefox 2 tweaking
To load "incompatible" addons
Go to about:config, add the boolean value extensions.checkCompatibility and set it to false
I am using the following "incompatible" addons successfully with Firefox 2:
To remove the "Go" button from the URL bar
Go to about:config, change the boolean value of browser.urlbar.hideGoButton to true
I will update this blog from time to time with more notes about Firefox 2
Tuesday, September 12, 2006
How to run Subversion 1.4.0 in Windows
Subversion 1.4.0 was released the other day, adding many exciting new features.
Subversion is a modern source revision control software, a very useful utility for a developer to easily keep track of changes in source code. Subversion runs as a server, either directly through svnserve, or as a module in the Apache web server.
Subversion is open source and runs on Windows, Linux, Mac OS X and more.
Homepage is here.
TortoiseSVN is a Windows client to Subversion shell extension, integrating Subversion features directly into the Windows Explorer.
Homepage is here.
As I am developing under the Windows platform mostly, and working with web development, I have been frustrated in the past for the lack of Apache 2.2 support in the 1.3 branch of Subversion. But behold! A new shiny feature of the 1.4 branch is the svnserve, which will now run natively as a Windows service.
Now I can simply run Subversion as a separate server, and as a side effect I can upgrade to Apache 2.2.3 on my development box.
Here's a quick rundown in how to install Subversion 1.4.0 and TortoiseSVN under Windows.
1. Installing Subversion
Download svn-1.4.0-setup.exe from here.
Install Subversion to D:\SVN
2. Create a repository (Read more here).
In this setup, I will use only one "root repository", and place my projects as subdirectories under this repository. There are other ways to configure multiple repositories if you prefer.
3. Configure user access to the repository
Edit D:\SVN\repos\conf\svnserve.conf:
Edit D:\SVN\repos\conf\passwd:
4. Import directory into the newly created repository
5. Install the svnserve Windows Service
6. Starting and stopping the service
You can now start and stop the service as any other Windows service:
7. Uninstalling the service
8. Install TortoiseSVN
Download TortoiseSVN-1.4.0.7501-win32-svn-1.4.0.msi (or newer) from here.
Install & reboot machine.
Choose to what directory to import the repository, and make sure the directory is empty.
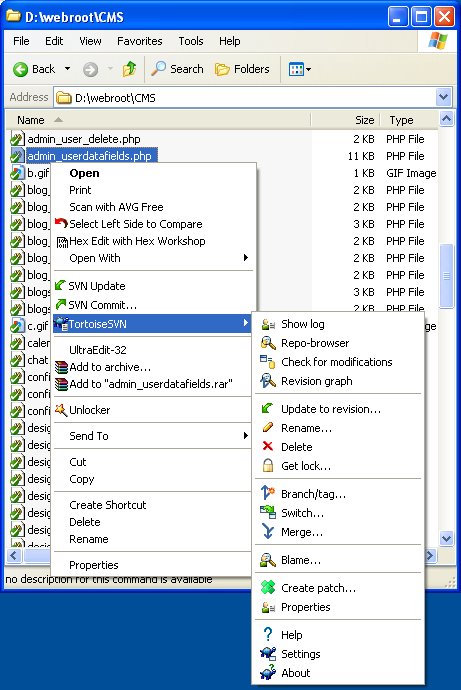
Right click on the directory, in my example D:\webroot
Select SVN Checkout
In URL of repository, type: svn://localhost:48000/webroot
You will now be presented with a user authentication dialog box. Enter your username and password here and let the program remember your settings.

Subversion is a modern source revision control software, a very useful utility for a developer to easily keep track of changes in source code. Subversion runs as a server, either directly through svnserve, or as a module in the Apache web server.
Subversion is open source and runs on Windows, Linux, Mac OS X and more.
Homepage is here.
TortoiseSVN is a Windows client to Subversion shell extension, integrating Subversion features directly into the Windows Explorer.
Homepage is here.
As I am developing under the Windows platform mostly, and working with web development, I have been frustrated in the past for the lack of Apache 2.2 support in the 1.3 branch of Subversion. But behold! A new shiny feature of the 1.4 branch is the svnserve, which will now run natively as a Windows service.
Now I can simply run Subversion as a separate server, and as a side effect I can upgrade to Apache 2.2.3 on my development box.
Here's a quick rundown in how to install Subversion 1.4.0 and TortoiseSVN under Windows.
1. Installing Subversion
Download svn-1.4.0-setup.exe from here.
Install Subversion to D:\SVN
2. Create a repository (Read more here).
D:\SVN\bin>svnadmin create D:\SVN\reposThis will create a repository in the directory D:\SVN\repos (the directory will also be created).
In this setup, I will use only one "root repository", and place my projects as subdirectories under this repository. There are other ways to configure multiple repositories if you prefer.
3. Configure user access to the repository
Edit D:\SVN\repos\conf\svnserve.conf:
[general]This will block anonymous read access, and allow write access to the users specified in the "passwd" file.
anon-access = none
auth-access = write
password-db = passwd
realm = webroot repository
Edit D:\SVN\repos\conf\passwd:
[users]This will allow the user "martin" write access using the password "test123"
martin = test123
4. Import directory into the newly created repository
D:\SVN\bin>svn import D:\webroot file:///d:/SVN/repos/webroot -m "initial import"This will import D:\webroot and all subdirectories into the repository in the subdirectory "webroot", notice that I don't import this directly under the root directory. We will later be able to easily import different projects at the same directory level (ie file:///d:/SVN/repos/otherproject)
5. Install the svnserve Windows Service
C:\>sc create SVN binpath= "D:\SVN\bin\svnserve.exe --service --root D:\SVN\repos --listen-port 48000" displayname= "Subversion" depend= Tcpip start= autoThe syntax is a little wierd, I know. The whitespace after = is required by the SC tool.
[SC] CreateService SUCCESS
6. Starting and stopping the service
You can now start and stop the service as any other Windows service:
C:\>net start svn
The Subversion service is starting.
The Subversion service was started successfully.
C:\>net stop svn
The Subversion service is stopping.
The Subversion service was stopped successfully.
7. Uninstalling the service
C:\>net stop svn
The Subversion service is stopping.
The Subversion service was stopped successfully.
C:\>sc delete SVN
[SC] DeleteService SUCCESS
8. Install TortoiseSVN
Download TortoiseSVN-1.4.0.7501-win32-svn-1.4.0.msi (or newer) from here.
Install & reboot machine.
Choose to what directory to import the repository, and make sure the directory is empty.
Right click on the directory, in my example D:\webroot
Select SVN Checkout
In URL of repository, type: svn://localhost:48000/webroot
You will now be presented with a user authentication dialog box. Enter your username and password here and let the program remember your settings.
Subscribe to:
Posts (Atom)
